
Digging in your own yard feels empowering—you uncover hidden tree roots, reshape the land, and maybe even pour a fresh driveway. But behind every successful hole is a plan that keeps you, your neighbors, and your wallet safe. This guide walks you through the steps an excavating professional would follow, in everyday language you can use today. By the end, you’ll know enough to rent equipment with confidence, schedule the right helpers, and avoid the costliest beginner mistakes.
Calling Utility Locate Services
Before the shovel touches soil, call your local utility-locate hotline (often “811” in the U.S.). Lines for gas, water, electric, internet, and sewer might crisscross only inches below the lawn. Tapping one can cause outages, injury, or big repair bills. The locate crew will mark each service with bright spray paint or flags—learn their color code so you know what you’re seeing.
While you wait the two or three business days for markings, sketch your project on paper. Note where you plan to trench, install footings, or level land for driveway paving. When the locator finishes, compare the paint to your sketch and adjust the dig path. A grading contractor would call this risk mitigation—planning that prevents trouble later and keeps trench safety front-of-mind.
Also remember that locators don’t mark private lines such as sprinkler pipes or propane feeds to detached garages. Ask previous homeowners or neighbors if they know of any hidden runs. A quick probe with a fiberglass rod can locate shallow PVC before a metal blade does the damage. Taking an hour here often saves a day of repairs later.
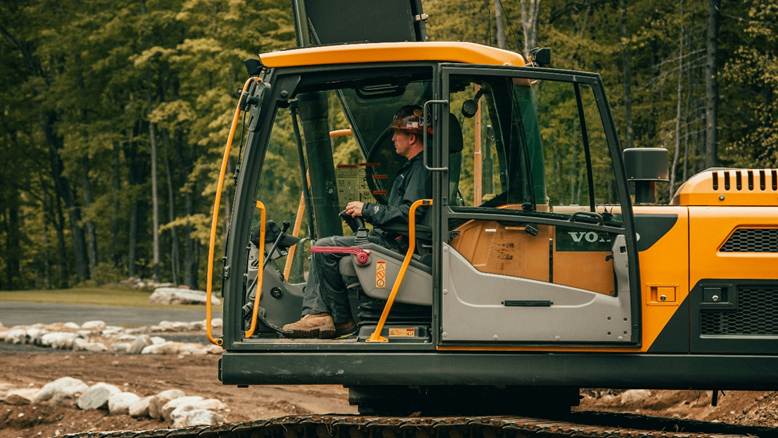
“What Gear Protects Operators?”
Even compact machines pack enough force to snap bones or fling gravel at windshield speed. Dressing for the task cuts those hazards down to size and helps rental yards trust you with their equipment. Think of it as your personal insurance policy that costs far less than an emergency-room visit. Good gear also boosts productivity—when you’re comfortable and protected, you work longer without fatigue. Click this page for additional information.
- Head & eyes: A hard-hat shields you from dropping branches; safety glasses deflect flying pebbles.
- Body visibility: High-vis vest and reflective stripes make sure helpers see you around moving earthmoving equipment.
- Hands & feet: Leather gloves grip wet tools; steel-toe boots guard against rolling rocks and sharp shovels.
- Hearing & restraint: Ear muffs tame engine roar, and a fastened seat belt keeps you inside the operator’s protective structure if the machine lurches.
Running a compact excavator? Lock the rollover bar upright and verify its pins before ignition. Proper gear also sets the tone for helpers—it’s easier to enforce safety rules when you practice them yourself.
Soil Stability Tests Explained
Soil isn’t one uniform material. Clay sticks, sand slides, and loam sits somewhere between. To keep a trench wall from collapsing, perform a quick “jar test.” Scoop half a jar of damp soil, add water, shake, and let it settle. Layers tell you the mix. Dominant sand layers mean water drains fast but sidewalls cave easily; clay holds shape yet can become slick.
Professional crews run penetrometer readings, but you can mimic the logic: press a screwdriver into undisturbed ground. If it sinks with light pressure, brace your walls with plywood and stakes. Stable soil lets you cut steeper slopes, saving time and fill. Knowing soil type also helps later when you form an aggregate base for patios or paths—rocky soil needs less imported gravel, yet every base must still encourage runoff so water never pools beneath finished surfaces.
If you hit unexpected groundwater, pause and pump the area dry before continuing. Wet conditions change soil behavior instantly and can overwhelm shoring that looked solid minutes earlier. Treat every excavation as a living system that changes with weather, vibration, and time.
Creating a Compact Base Layer
Once earth is removed, a good base prevents sinking pavers and cracked concrete. Spread crushed stone in 3-inch lifts and run compaction equipment—a rented plate tamper—over each lift until it “rings” instead of rumbles. Keep the base slightly crowned to shed rain toward planned swales or drains.
Need a local benchmark? Many homeowners in Tennessee look to excavating contractor Lebanon crews for examples of well-compacted limestone bases that stand up to freeze-thaw. When in doubt, copy the depth they use: 6 inches for walks, 8–10 inches for driveways. If you plan to finish with asphalt resurfacing later, ask the quarry for a mix labeled “crusher run” that locks tight under vibration.
Here’s a handy map reference if you want to see a professional project up close:
Visit during business hours and you’ll often see crews layering rock, testing compaction, and setting forms—all steps worth watching.
Post-Dig Site Cleanup
A finished job isn’t done until the neighborhood can’t tell you tore up the yard. Smart cleanup prevents erosion tickets from the city and keeps newly paved surfaces looking sharp when prospective buyers drive by. Plus, good housekeeping protects tools—shovels stored mud-free last years longer.
- Protect hard surfaces: Rake loose soil off walks and drives so it won’t wash into storm drains or stain fresh concrete.
- Remove debris: Bag broken roots, scrap lumber, and spent geotextile for green-waste or landfill pickup. Follow this link https://en.wikipedia.org/wiki/Green_waste to know more about green waste.
- Return rentals clean: Pressure-wash tracks and buckets before the equipment yard inspects them—muddy undercarriages invite cleaning fees.
- Stabilize the landscape: Seed or straw-cover bare earth, then install simple silt-fence along downhill edges. This keeps your rich topsoil on the property and stops neighbors’ driveways from clogging with mud after the first rain.
Finally, photograph the finished area from multiple angles. Photos document that you restored drainage channels and replaced fence panels if disputes arise later. They also provide a satisfying “before-and-after” record of your handiwork.
Digging safely is part science, part patience. Call before you dig, gear up like the pros, test your soil, build solid bases, and leave the yard cleaner than you found it. These habits turn weekend warriors into backyard legends—and help your project last for seasons to come.


More Stories
Quality Paving by Professional Asphalt Contractor
Singapore’s Vertical Revolution: Why Every Lift Journey Matters More Than You Think
How to Find the Best Construction Companies in Christchurch